
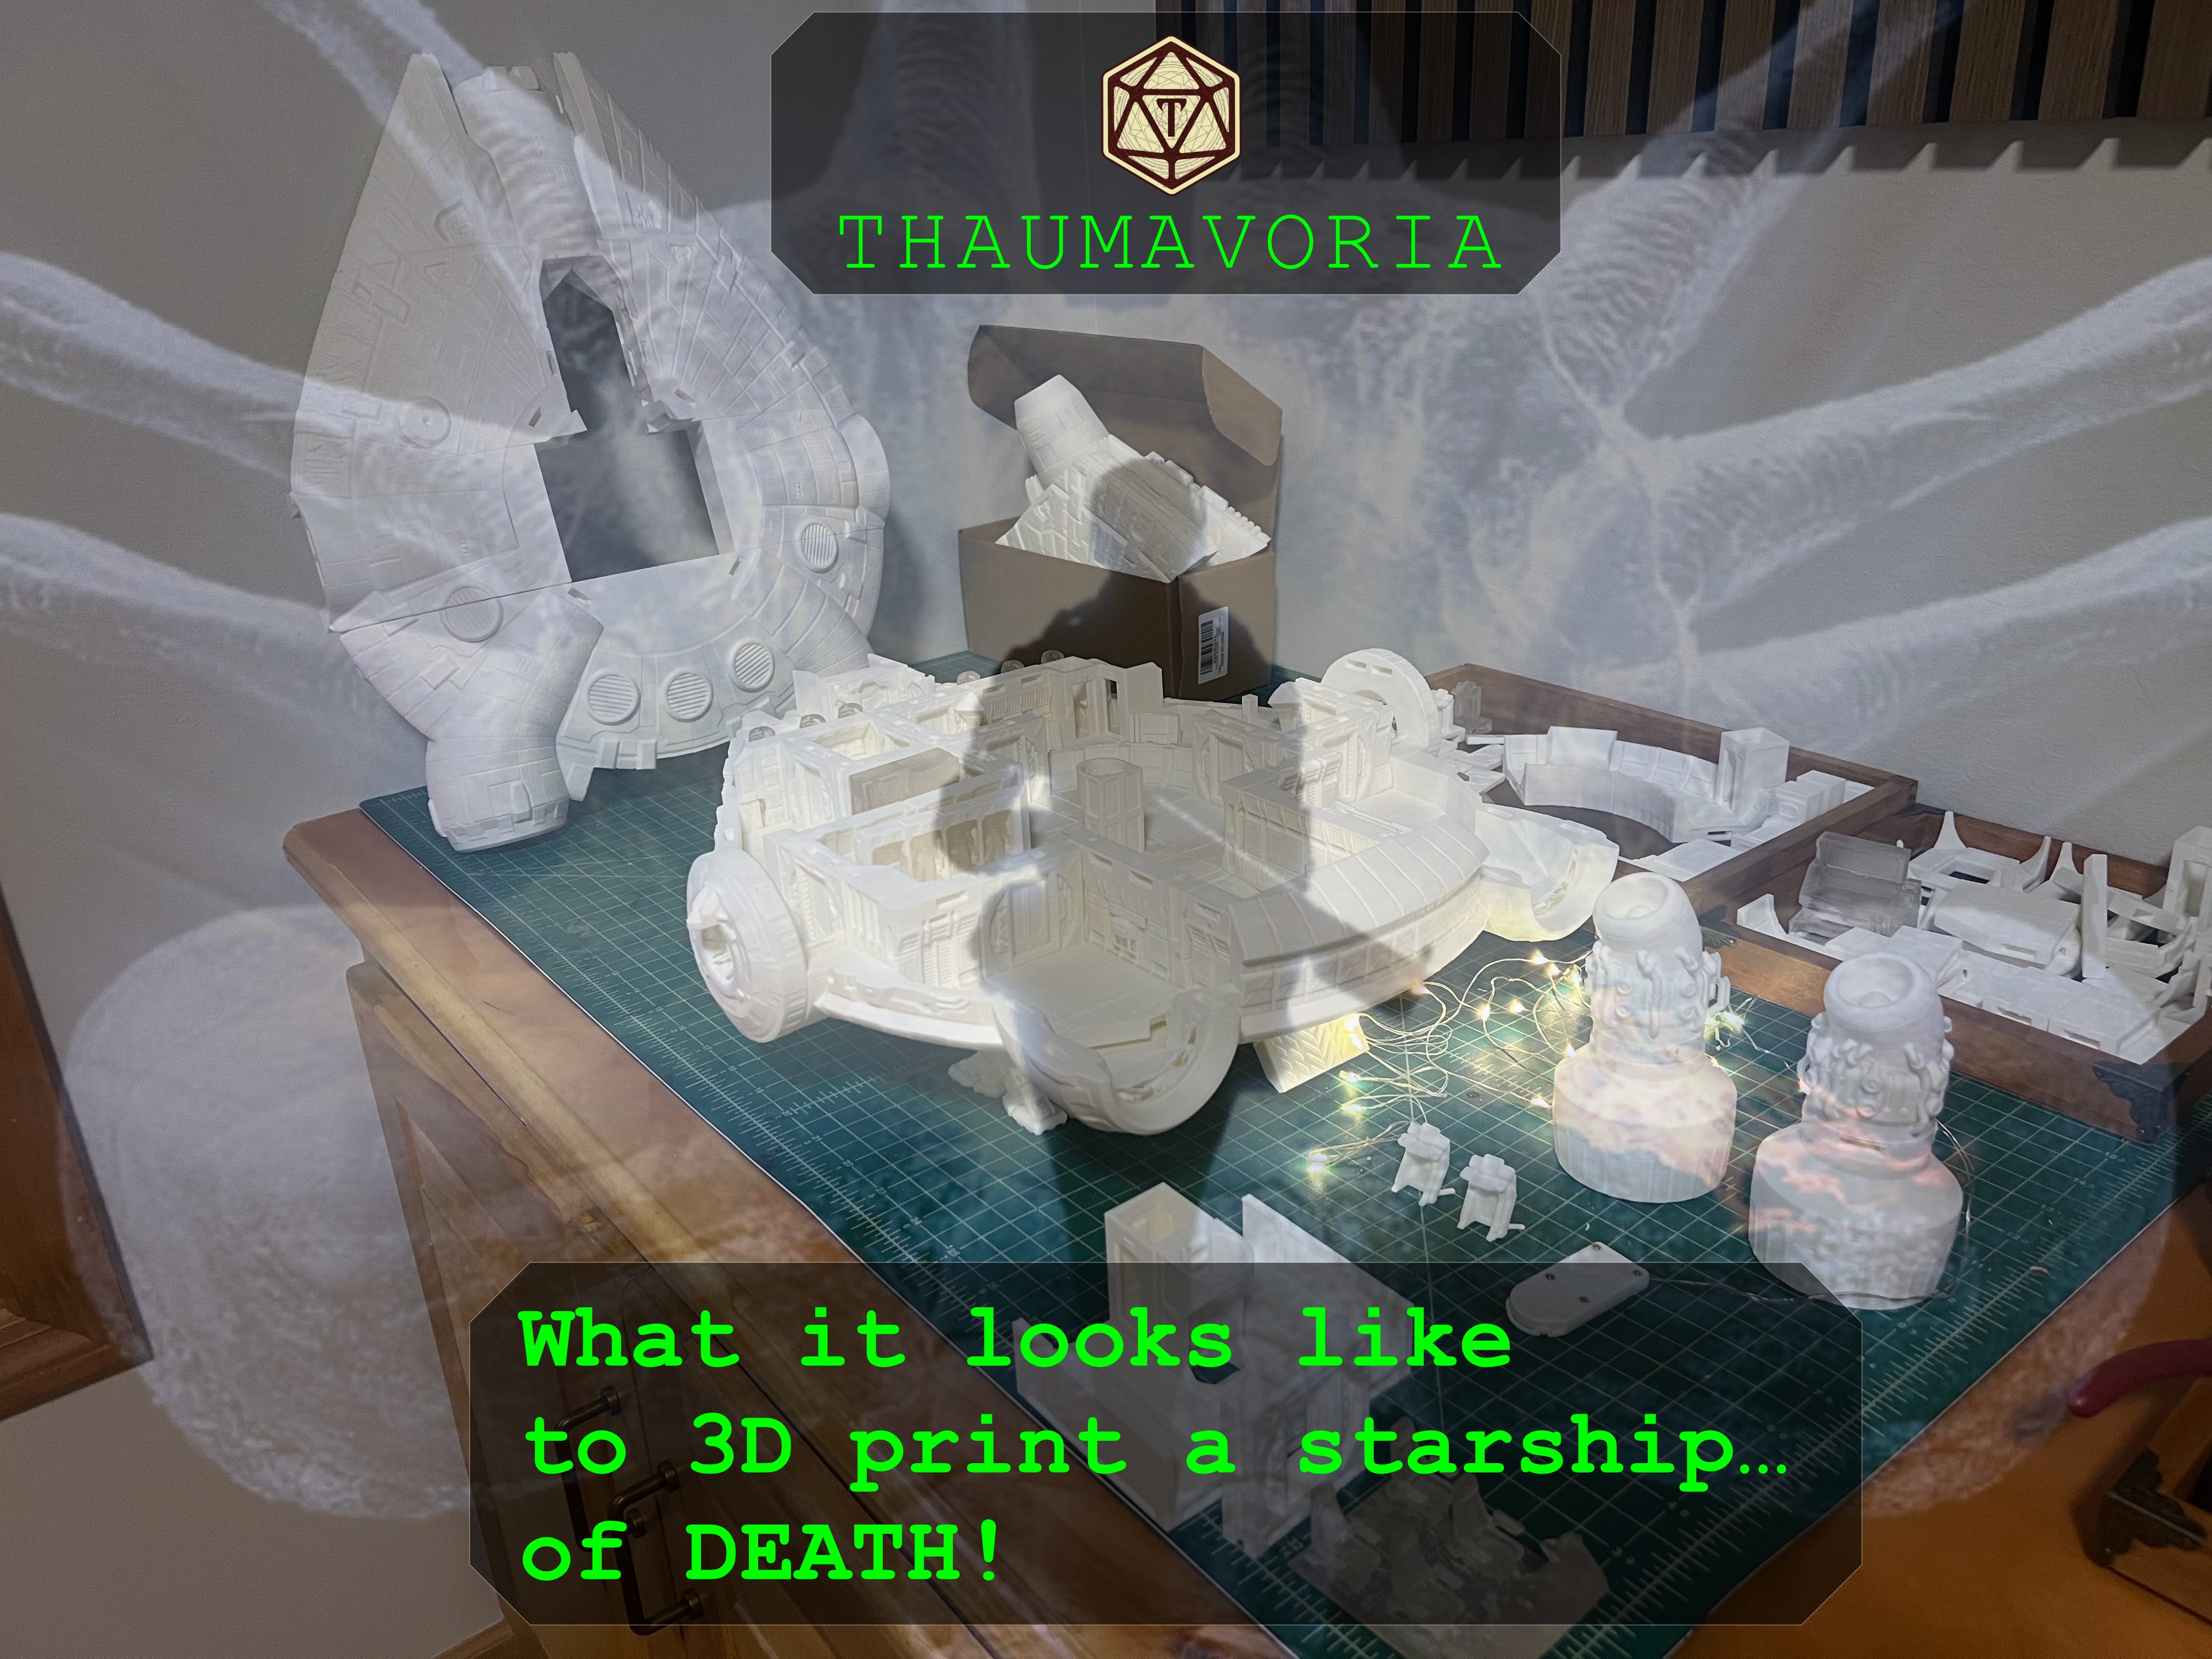
What it looks like to 3D print a starship… of death
Making a knock-off Millenium Falcon for table play is harder than it looks!
In case you missed the first article in this series, where I listed and analyzed all the 28mm-scale spaceships designed by Ben Moldray of 2nd Dynasty, the TLDR is that most of his stuff is objectively amazing but I wanted to go with a “Transport Delta” as my ship of choice for an Alien/Mothership session. I wanted a slightly claustrophobic but many-roomed ship for an entertaining survival horror experience, and the Transport Delta fit the bill perfectly.
In this second article, I want to walk you through the actual process of printing this ship out. It’s a process I’ve been through before with Ben’s other ships, and due to the fact that he designs ships to have modular, functional (in the sense of playing an RPG) interiors, the actual job of sorting which parts to print and then assembling them is like assembling a 3D puzzle.
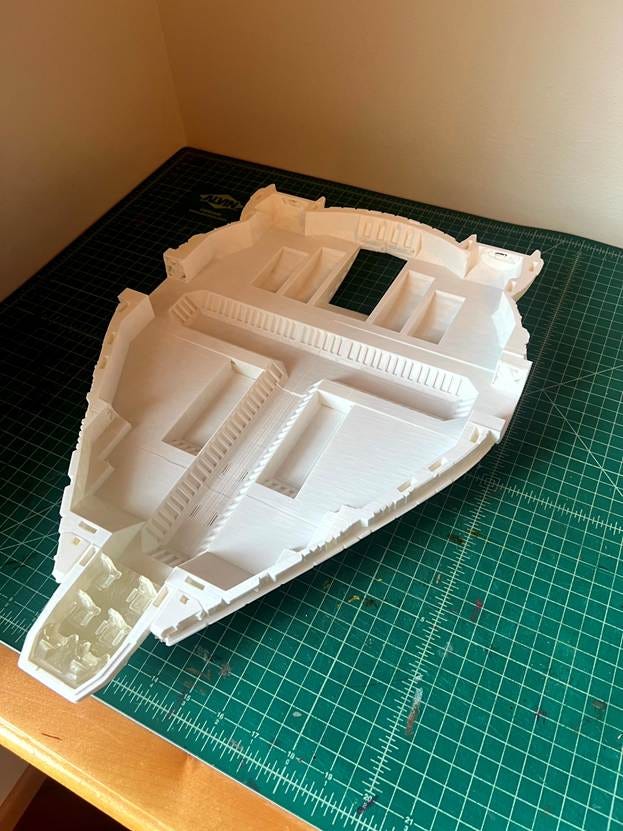
Just so you know what we’re working with here, this is an image taken from the front page of the assembly instruction manual. Clearly it’s a design inspired by Ron Cobb’s Millenium Falcon, with some modifications. Scale-wise, it’s not quite as spacious as the Falcon. I think a 28mm-scale Falcon would be simply gargantuan. But this model proved to be quite enough in terms of material, effort and most importantly, play possibilities.

Parts, Parts, Parts
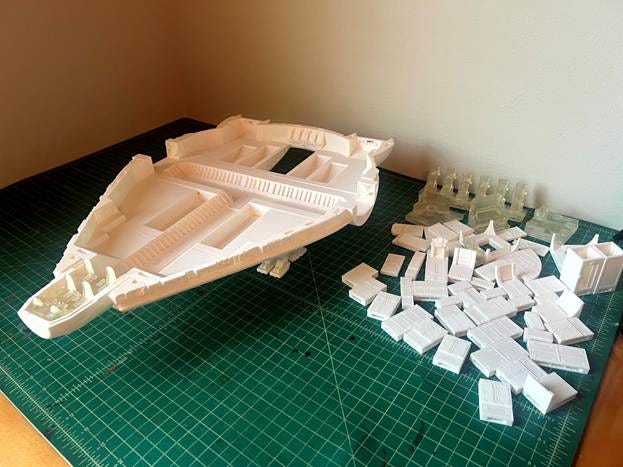
I’m not going to give you a blow-by-blow of every step in the assembly of this thing, but I want you to have a glimpse of what the actual process looks like. Check out how many parts there are just for the bottom tray of the ship. And you would think that they all just snap together and you’re good to go, but in order to get a proper amount of stability and rigidity in the model, I found it prudent to actually superglue (CA50 glue + activator spray) all the parts together. Otherwise you end up with a creaky, increasingly floppy mess that will come apart when you lift it.

And here we go with the real thing:
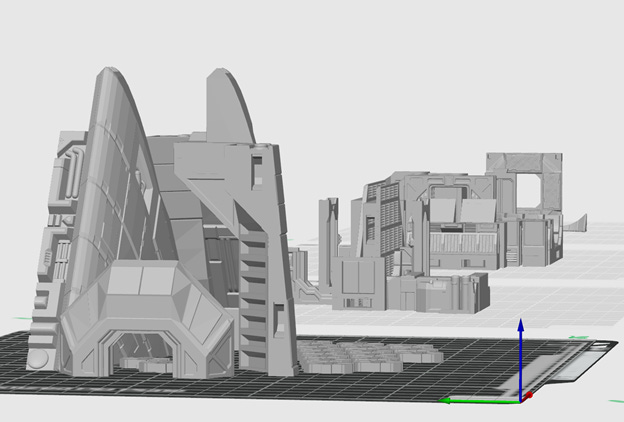
I’m a bit of a veteran when it comes to these relatively bigger print projects, but I think if I were just starting my 3D printing journey, I would have been shocked at how much filament and time is required just to print the lower hull, let alone the entire ship. Laying all the pieces out in the slicer (software that translates the model into instructions for the printer) produces a staggering view of things, and almost looks like a scifi city. This is just one row out of about six or seven. I lost count.
If only this ship were as easy as slapping together a dozen chunky blocks. But alas, there is the interior. Check out this parts list for the default interior configuration:
Yes, the model is modular, but the tolerances are rather tight and any modification you make to this default layout will result in gaps or displacements that need to be accommodated by changes in other surrounding pieces. In other words, it’s not very easy to change the floorplan on the fly unless 1) you use special software developed by 2nd Dynasty which depicts their library of parts in a 3D space and you can conjure them and assemble them however you want, or 2) you just print out a bunch of each possible interior part so that you can draw from your physical library and trial-and-error your way to a floorplan that fits with the hull.
I did neither of those things. I just went with the default interior. Here is the first wave of interior parts. The floor pieces are not very intuitive in terms of where they actually go. But practically speaking, this is no more difficult than a Lego set intended for 12-year-olds.
Here is a series of timelapse videos showing a few of the seemingly endless print jobs required to generate all the needed interior pieces. If only it was really this fast. These print jobs each took about half a day.
The Big Switcharoo
Just to make sure things were difficult on my end, I decided to change the ship I wanted to print at around this stage in the process. It wasn’t a completely different ship, but the thing was, I was never happy with the way that the cockpit/bridge of the original ship’s design sat at the fore of the ship. It gave me a lot of anxiety thinking about the ship smashing head-on into a space station and obliterating the entire command crew, or the bridge taking direct enemy fire.
Lucky (or unlucky) for me, Ben had more recently released an update to this ship that contained a number of variants. This update primarily moved the bridge up towards the middle of the ship, and replaced that fore section with an airlock door. I just thought that was way cooler and more practical, so I had to have it!

Unfortunately, that meant scrapping the front portion of my lower hull and not using several dozen interior pieces that I had already printed. It also caused some fitting problems that required me to cut plastic with a vibro-blade that I happened to have. Ugly business indeed, but whatever. We were good to go with the new design. Here is what it started to look like. Notice the airlock door at the front of the ship. Also notice those two wooden trays of parts in the back. I would no longer be using about 95% of those parts.

Fast forward to after I printed the upper hull, and it’s really starting to come together! The pieces on the right are all the ones from the previous ship variant that I had printed before realizing that I wanted to use the updated design. The hull parts are a loss, but I think I might possibly be able to use the interior pieces on a future ship or maybe an interior-only floorplan.

Here are a couple more views of the ship:

One thing I really wanted to do with this ship was to have some lights in it, not for aesthetic reasons but for PLAY functionality. I wanted players to enter the ship and be tasked with getting various systems up and running, and when those systems came online, they would light up. In order to do that, I figured that I would need to print certain parts out of clear resin. For example, the cryopods (not included in the original floorplan but easy enough to pop in without changing floor tiles), would light up once the crew managed to make a successful skill check somewhere. And those pods came out looking like this:

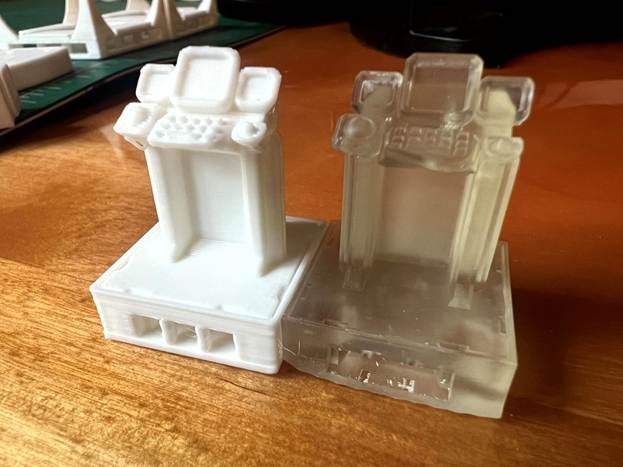
I intended on painting the “metal” components and leaving the windows clear. Another element was the control console. Here’s a comparison between printing with plastic at .2mm layer height and printing with resin at .05mm layer height, in case you were wondering:
Well anyway, I found that since I was using white plastic, my lights shone through pretty well. Here is the engine block at the aft of the ship prior to painting.

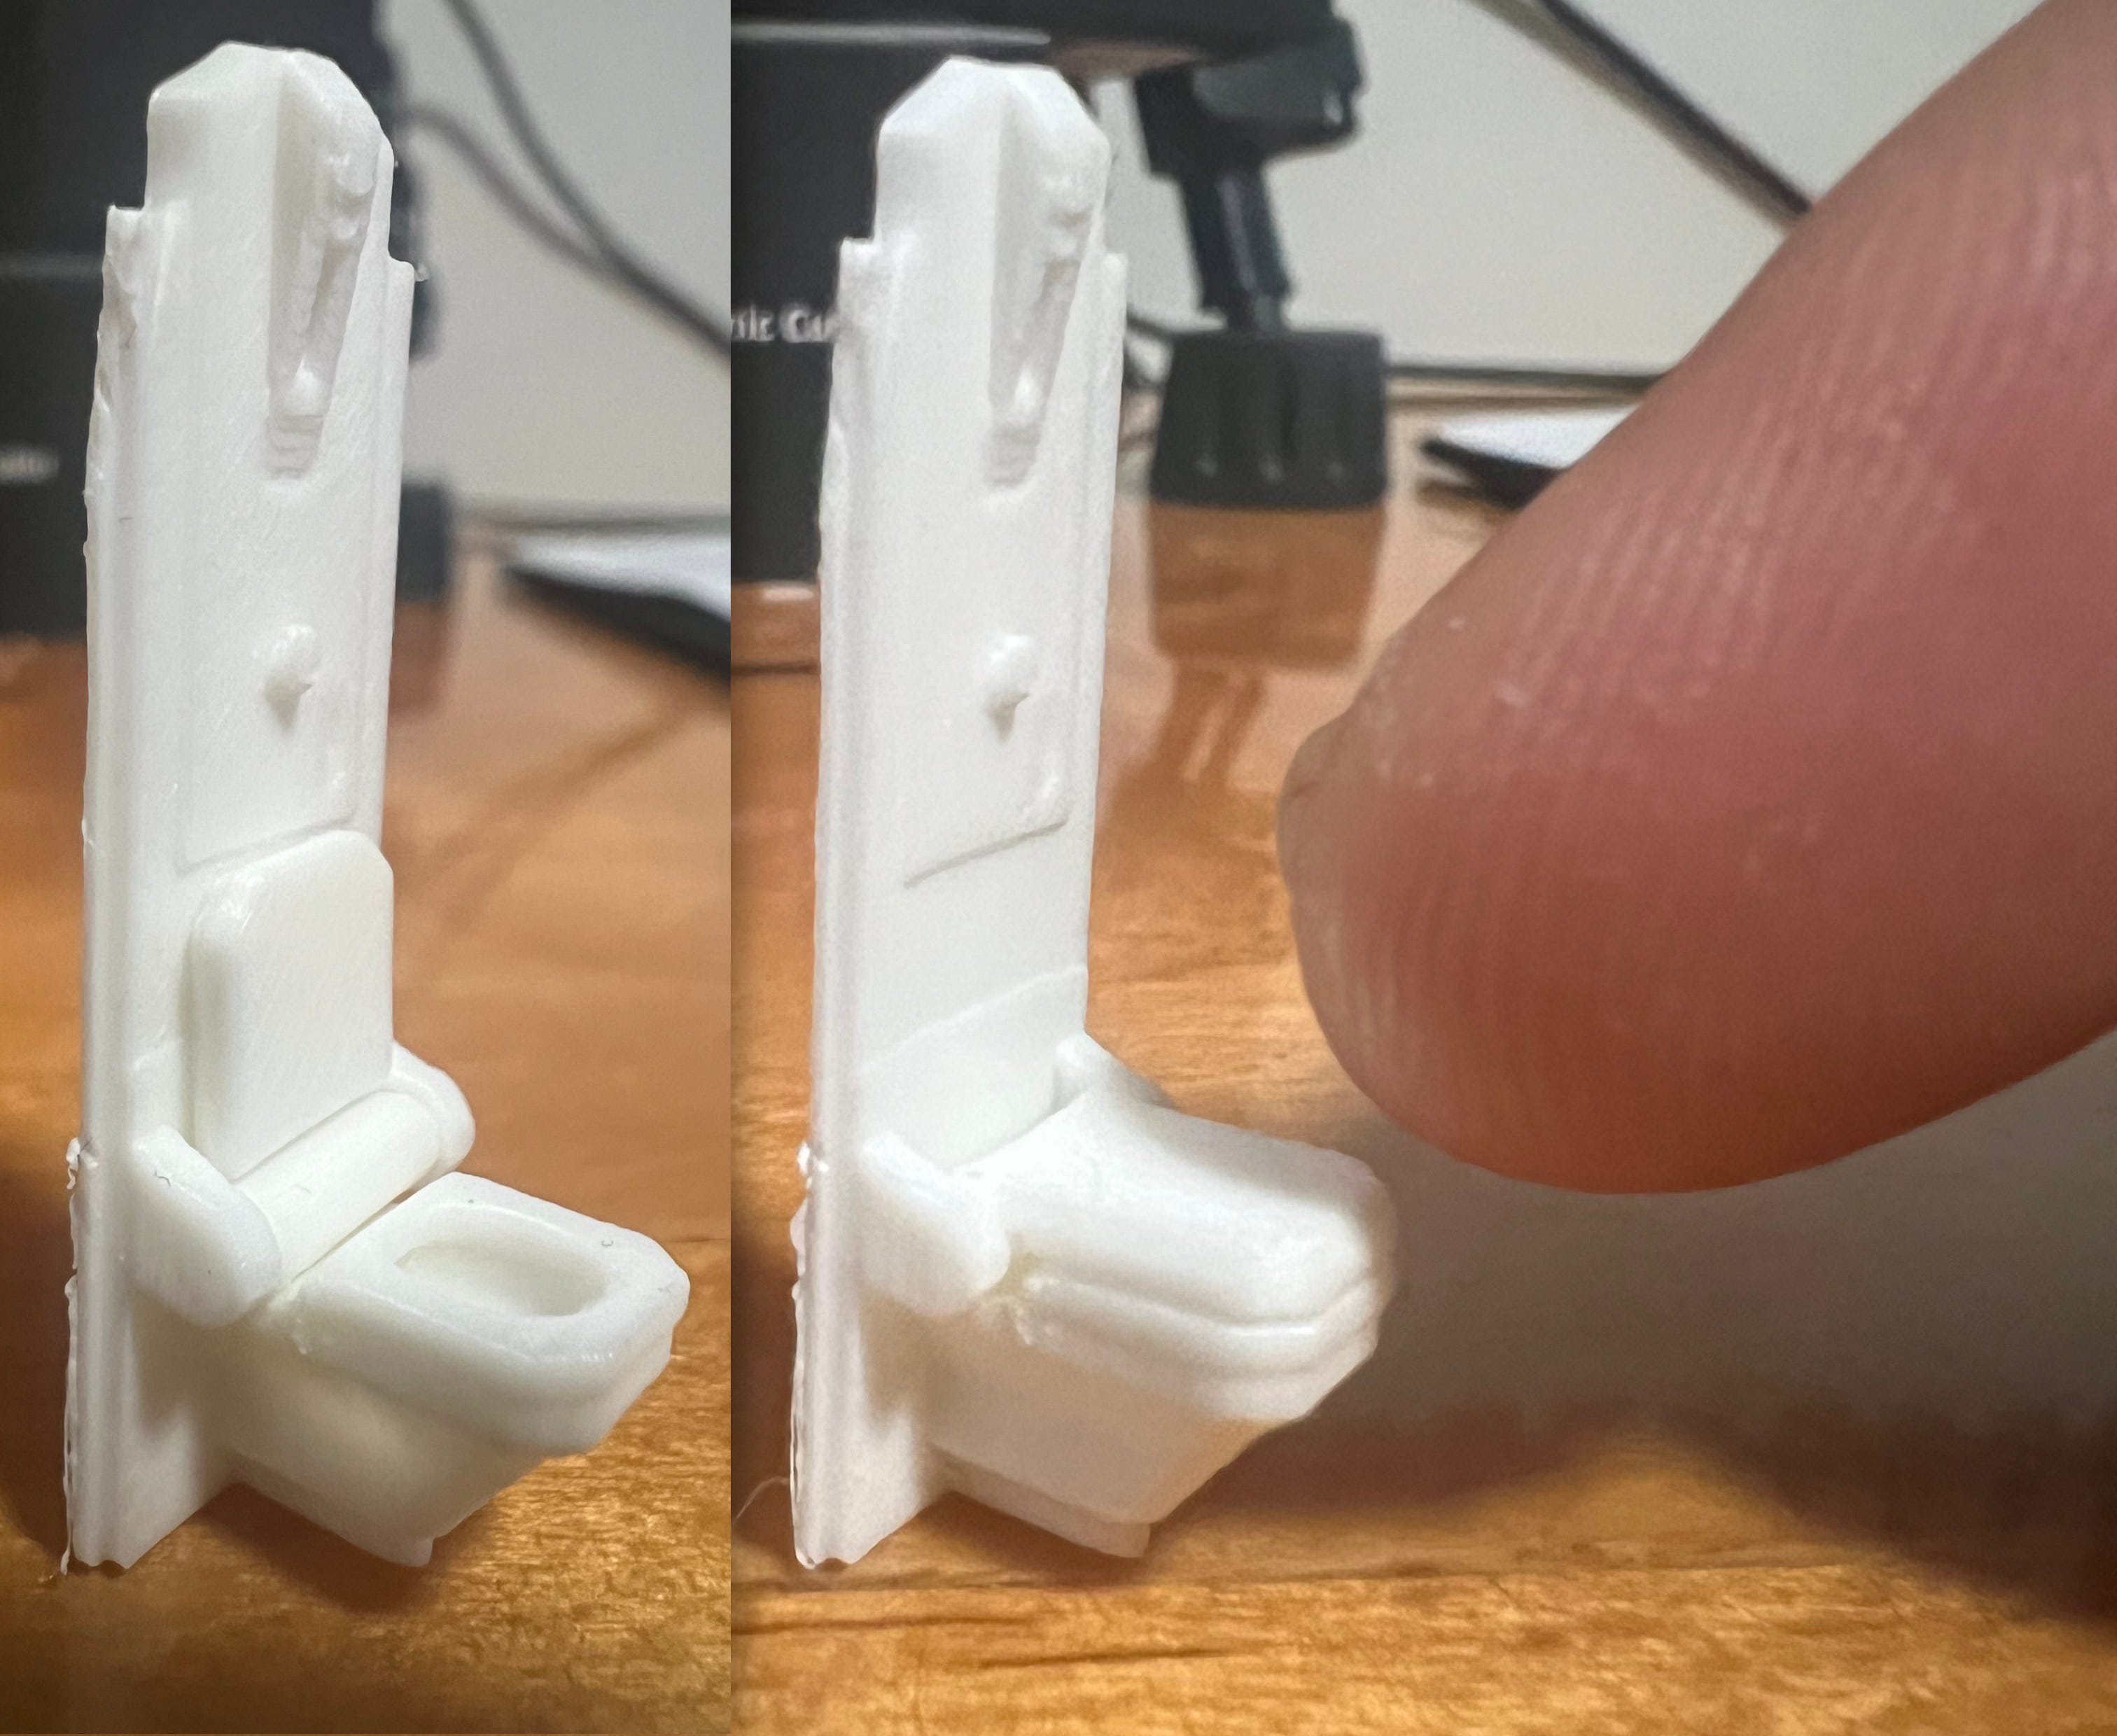
And finally, here is the bridge and officer’s quarters, which I had not yet properly fitted and attached to the upper hull. This is essentially the second floor of the ship. And for whatever reason, the toilet lid is functional. The thing doesn’t flush, though.
The next step would be to tackle the painting of the inside and outside of this beast. I’ll leave that for the next article. But here’s a preview of what that started to look like. It would require multiple passes after this before I could achieve that dirty lived-in look that I was going for.
